http://cs5tutorial.net/create-fantastic-stone-textures-in-photoshop/
The Final Image
This is what we will be creating: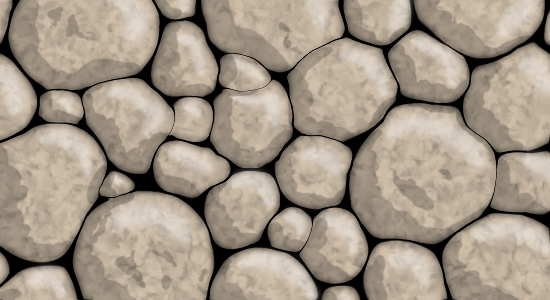
Step 1: Setting Up the Document
Create a new Photoshop Document (File>New) at any size with a black background. For this tutorial, I created one 550px x 300px (72 dpi).
Step 2: Making Dots
Make sure your foreground color is set to white. Now, select a nice-sized brush and set its hardness to 100% (To find the hardness slider, just open the Brush Preset picker by clicking on the brush icon at the top of the screen, right below the main menu bar). Start making dots.
Step 3: Creating More Dots
Use the ‘[' and ']‘ keys to change the brush size up or down and continue to fill in the dots until they take up the entire document.
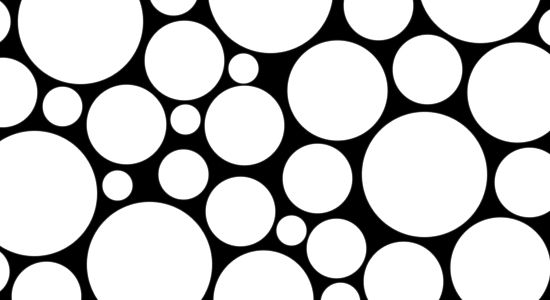
Watch where you put those dots!
It is important that no dot overlaps another. There must be black showing through all the way around every dot.Step 4: Preparing to Liquify
In the main menu, select Filter>Liquify. In this window, you will use the preset brush type (which should be the Forward Warp Tool). All you need to do is change the size by adjusting the slider on the right. Adjust the size to 95.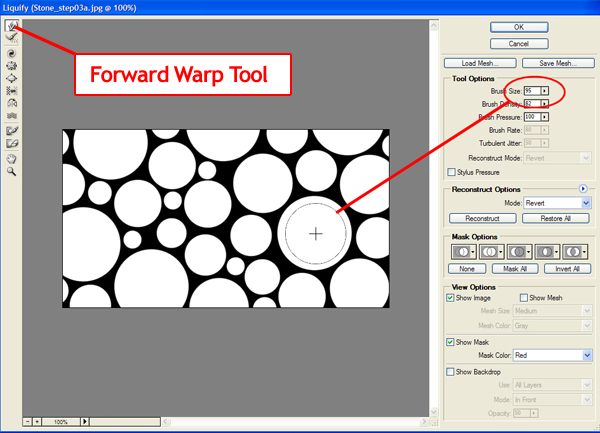
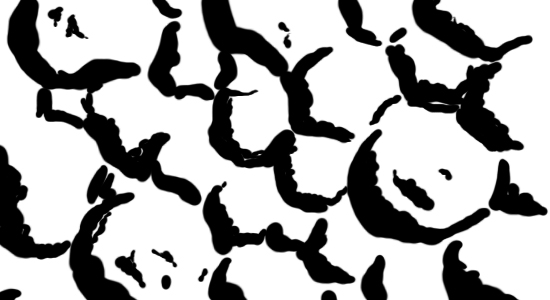
Step 5: Liquifying
On all the large dots, click inside the white space and drag your brush slightly over thier edges to ‘warp’ their shapes.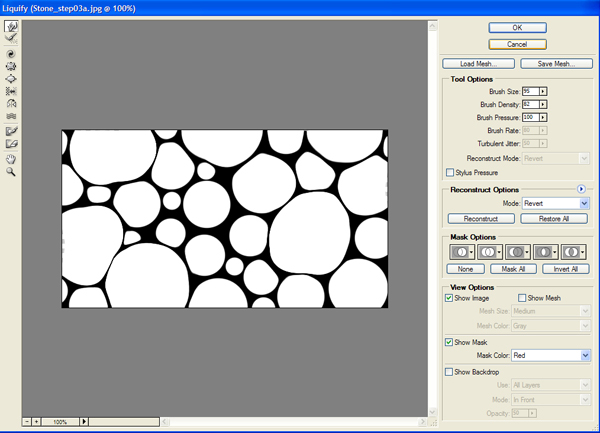
Doing it right!
It is important that you use a brush size smaller than the dot you are working on and that your brush is entirely within the dot before you click tp warp the shape. This limits any unwanted blurring of the edges.Step 6: More Liquifying
Continue with the rest of the dots, adjusting the size of the brush to fit that dot. Ultimately, you’ll want to ‘push’ the dots closer together until the black in-between becomes just a thin line. Click ‘OK’ when you’re done.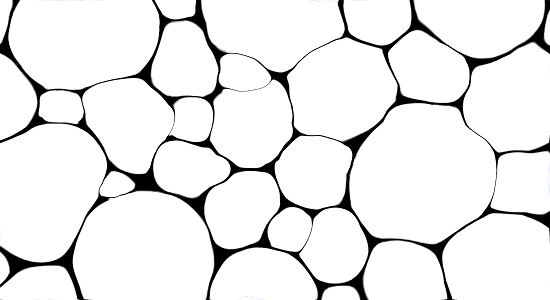
Step 7: Naming Layers
Double Click the ‘Background’ layer in the Layers panel to bring up the Layer Properties and rename it ‘Stone’.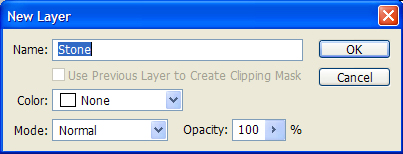
Step 8: Duplicating the Layer
Duplicate the ‘Stone’ layer (Ctrl⁄Cmd + J). Rename the new layer ‘Shadow’ and set it to Multiply.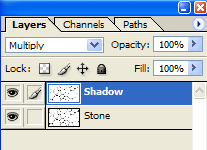
Step 9: Adding a Guassian Blur
In the main menu, go to Filter>Blur>Guassian Blur. Set the Guassian Blur to 3.5 and hit OK.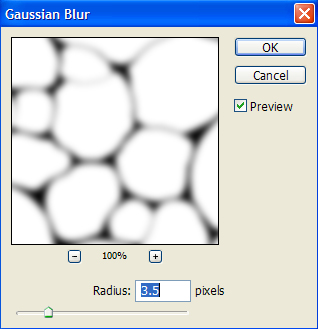

Step 10: Adding Layer Styles
Double click the ‘Stone’ layer to open up it’s Layer Styles. Add a Color Overlay and a Pattern Overlay with the following settings.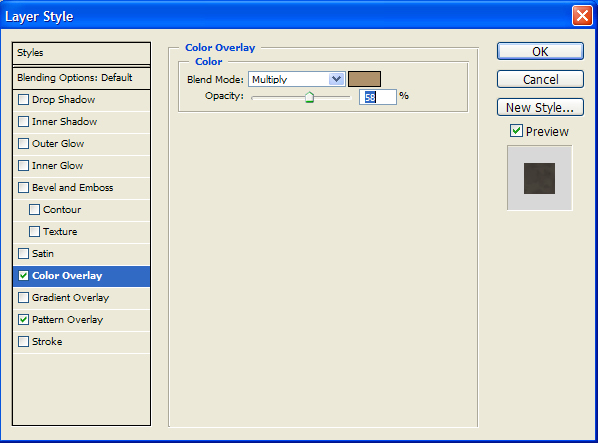
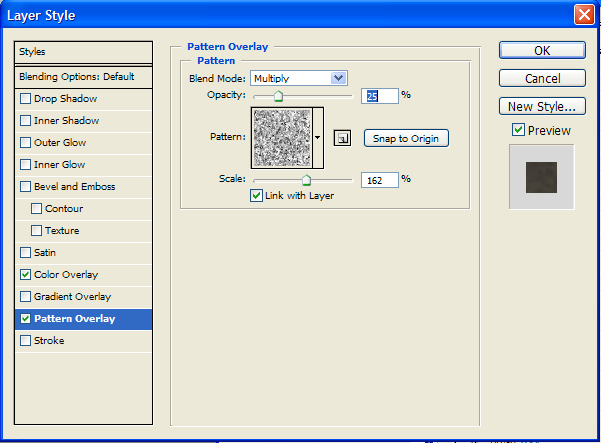
What’s That Pattern?
The pattern used is called ‘Shredded Plastic’. If you cannot find it, then, in the texture selection drop down, click the arrow and append the Texture Fill 2 set.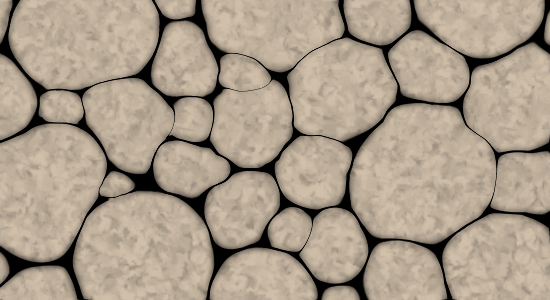
Step 11: Adding Highlights
Create a New Layer, name it ‘Highlights’. Use a small, white brush with 0% hardness to add some highlights.Here are the brush strokes on a black background (for illustrative purposes).

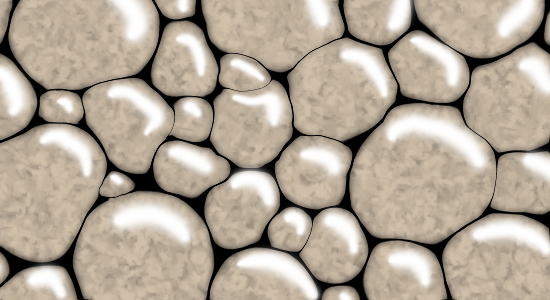
Step 12: Adjusting the Highlights
Set the transparency to 70%.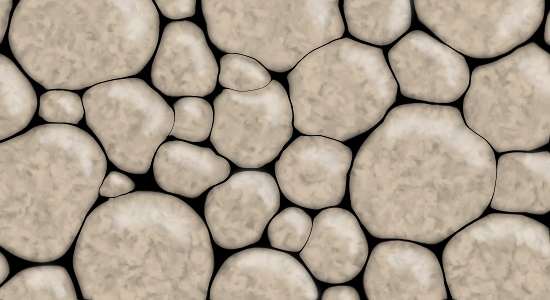
Step 13: Adding Low Lights
Create another New Layer and name it ‘Low Lights’. This time, use the color black with a 90% hardness to add low lights.Here are the brush strokes on a white background (for illustrative purposes).
Sloppiness Counts
Dont try to be neat. Be more jagged in your strokes to simulated that coarse stone contours.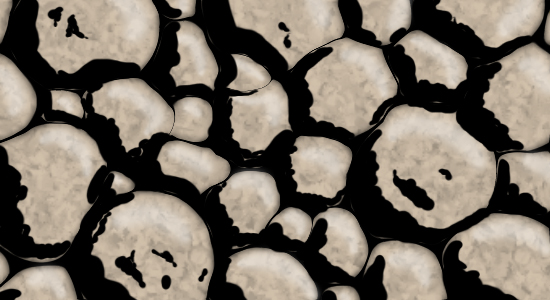
Step 14: Adjusting the Low Lights
Set the ‘Low Lights’ layer to 20%.
Không có nhận xét nào:
Đăng nhận xét